How To Create Glitch Effect In Illustrator
Nostalgia for '80s-era computer text has created a very popular "glitch" effect in the modern design community—possibly because it's easy enough to create in minutes.
Reminiscent of 3D images without glasses, a glitch effect calls to mind nostalgic arcade games, computer programs, and bitmap imagery. It's popular in the niche subculture of vaporwave art and might have even been the inspiration for the TikTok logo.
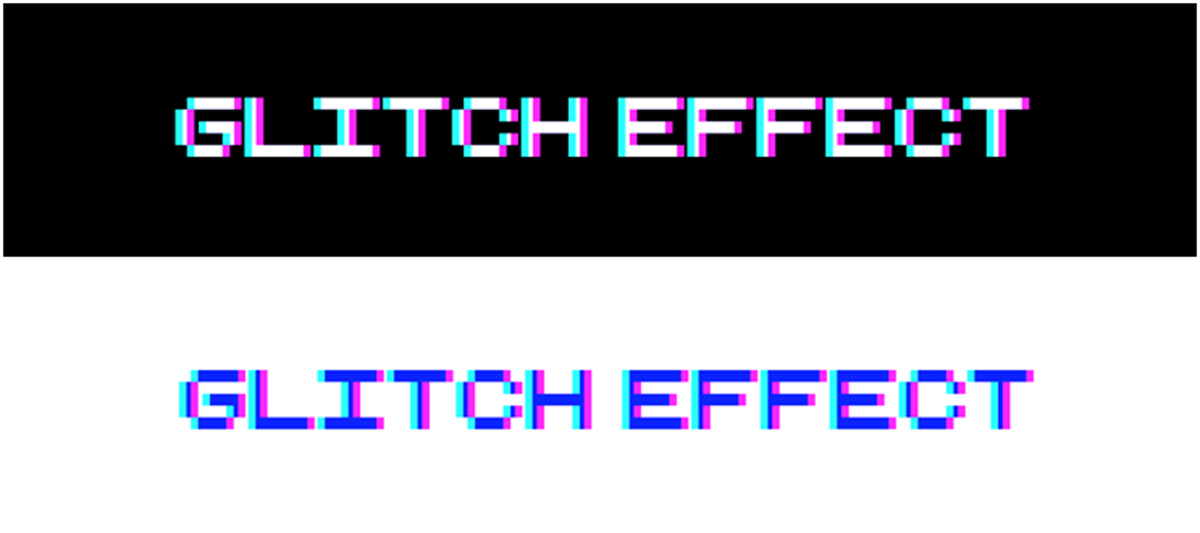
To the untrained eye, it might appear complicated, but once you look closely, you can break the effect into simple pieces. There is a neon blue and hot pink "haze" on either side of the text, plus some sections that appear to be shifted to the right and left. To achieve this same effect yourself, you'll actually only need two text layers—the white color in the middle is created by the overlap of the other two, as you'll soon find out.
You can use Adobe InDesign, Illustrator, or Photoshop to complete this tutorial, though the last optional step will be easiest in Photoshop. Once you've decided what text you would like to use, you can open your program of choice and get started.
- Create two copies of your text and use two contrasting colors.
You can use any font, but I went with a free digital one called "retro computer" to match the effect. You can copy your text box by holding down the alt or option key and then dragging the text box. Then, just highlight the text and select your colors! My go-to is to use the neon pink and blue from the default color swatches.

- Put both text boxes on top of each other.
The glitch effect looks most realistic when the text is in exactly the same position, just off-set a couple pixels to the right or left.
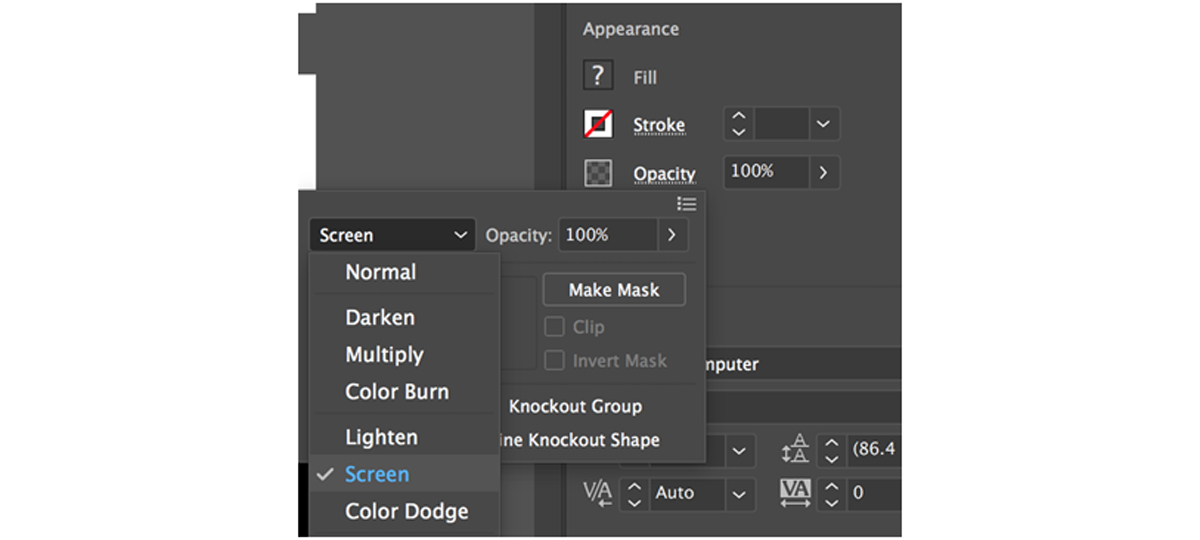
- Change the opacity blending mode to "screen" if you're using a black background or "multiply" if you're using a white background.
Blending modes control the way that colors overlap in Adobe programs. You can find them in most of the software (InDesign, Illustrator, Photoshop, Premiere Pro, After Effects, and more). They are meant to mimic the ways various colors interact on a digital interface, so a lot of them are built to replicate the techniques of color mixing found in film development, painting, and drawing.

When you apply the effect, you'll see that a new color is created in the overlap of your two colors. The resulting look makes it seem as if the text is "glitching" to the right and left, when in reality, it's two separate text boxes. (I have a secret suspicion that this is how they created the TikTok logo.)

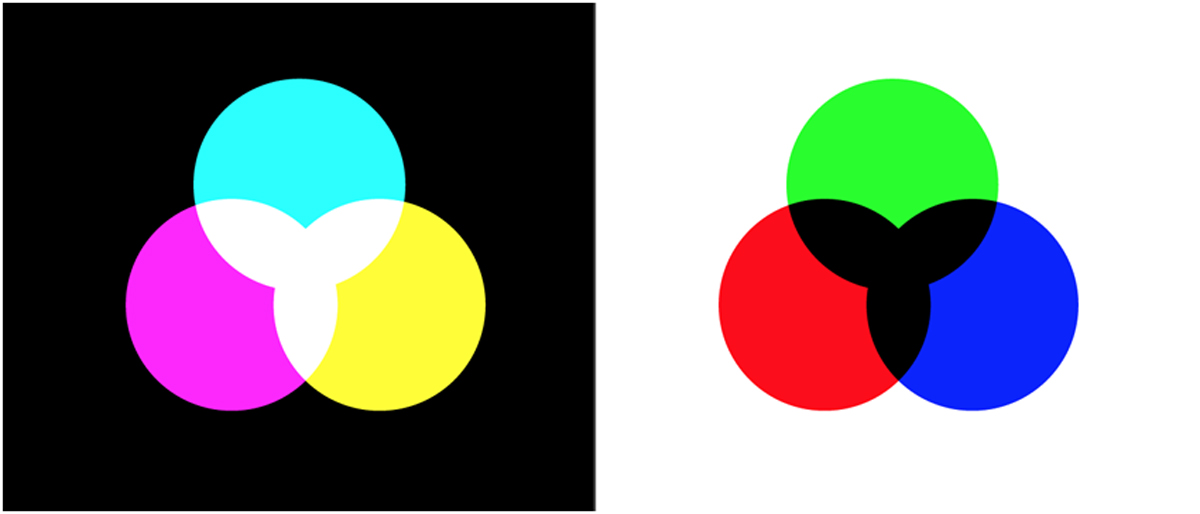
To learn why this works, we have to dive a bit into color science. "Screen" mode uses a technique called additive color mixing, which results in the creation of "white" when contrasting swatches are mixed. It's named after a film photography technique that requires shining light through screens, or photographic slides.
The "multiply" mode uses subtractive color mixing, which creates black when contrasting shades overlap. It's named, more predictably, after the effect of using multiple (as in, more than one) pens on top of each other.
 Additive vs. subtractive color mixing. Additive color mixing will create white when using cyan, magenta, and yellow (the "CMY" of "CMYK") and subtractive color mixing will create black when using red, green, or blue ("RGB").
 If you used the same colors as I did, you might notice that the "multiply" effect results in a dark blue overlap instead of a black one. The reason for this has to do with the color mixing. To achieve a black overlap, you need to use two of the base colors from RGB, as shown in the diagram. However, I personally like the pink/blue effect better, so I usually opt for that instead.

- Optional: If you're using Photoshop, merge the layers and shift sections of the text.

Draw a pixel-tall box using the rectangular marquee tool and shift it to the left and right. (If you are finding that the arrow keys move the box, but not the image, click the arrow tool instead of the rectangular marquee.) Repeat this as many times as possible to create the desired effect.

How To Create Glitch Effect In Illustrator
Source: https://makeitcenter.adobe.com/blog/glitch-text.html
Posted by: hoffmanvalinarts.blogspot.com

0 Response to "How To Create Glitch Effect In Illustrator"
Post a Comment