

Github How To Create A New Branch
About managing branches
You can use branches to safely experiment with changes to your project. Branches isolate your development work from other branches in the repository. For example, you could use a branch to develop a new feature or fix a bug.
You always create a branch from an existing branch. Typically, you might create a branch from the default branch of your repository. You can then work on this new branch in isolation from changes that other people are making to the repository.
You can also create a branch starting from a previous commit in a branch's history. This can be helpful if you need to return to an earlier view of the repository to investigate a bug, or to create a hot fix on top of your latest release.
Once you're satisfied with your work, you can create a pull request to merge your changes in the current branch into another branch. For more information, see "Creating an issue or pull request" and "About pull requests."
You can always create a branch in GitHub Desktop if you have read access to a repository, but you can only push the branch to GitHub if you have write access to the repository.
Repository administrators can enable protections on a branch. If you're working on a branch that's protected, you won't be able to delete or force push to the branch. Repository administrators can enable other protected branch settings to enforce specific workflows before a branch can be merged. For more information, see "About protected branches."
Creating a branch
Tip: The first new branch you create will be based on the default branch. If you have more than one branch, you can choose to base the new branch on the currently checked out branch or the default branch.
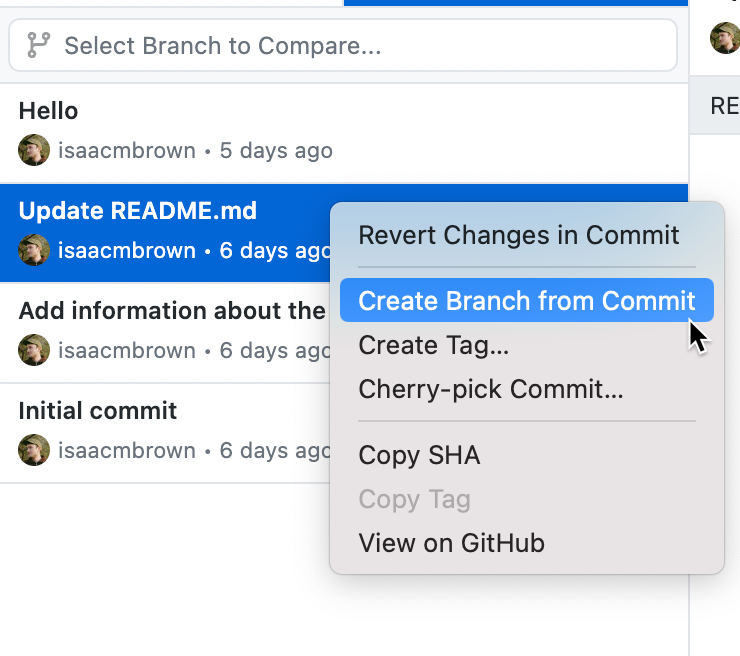
Creating a branch from a previous commit
- Click History.

- Right-click on the commit you would like to create a new branch from and select Create Branch from Commit.
- Under Name, type the name of the new branch.
- Click Create Branch.

Publishing a branch
If you create a branch on GitHub, you'll need to publish the branch to make it available for collaboration on GitHub.
- At the top of the app, click Current Branch, then click the branch that you want to publish.
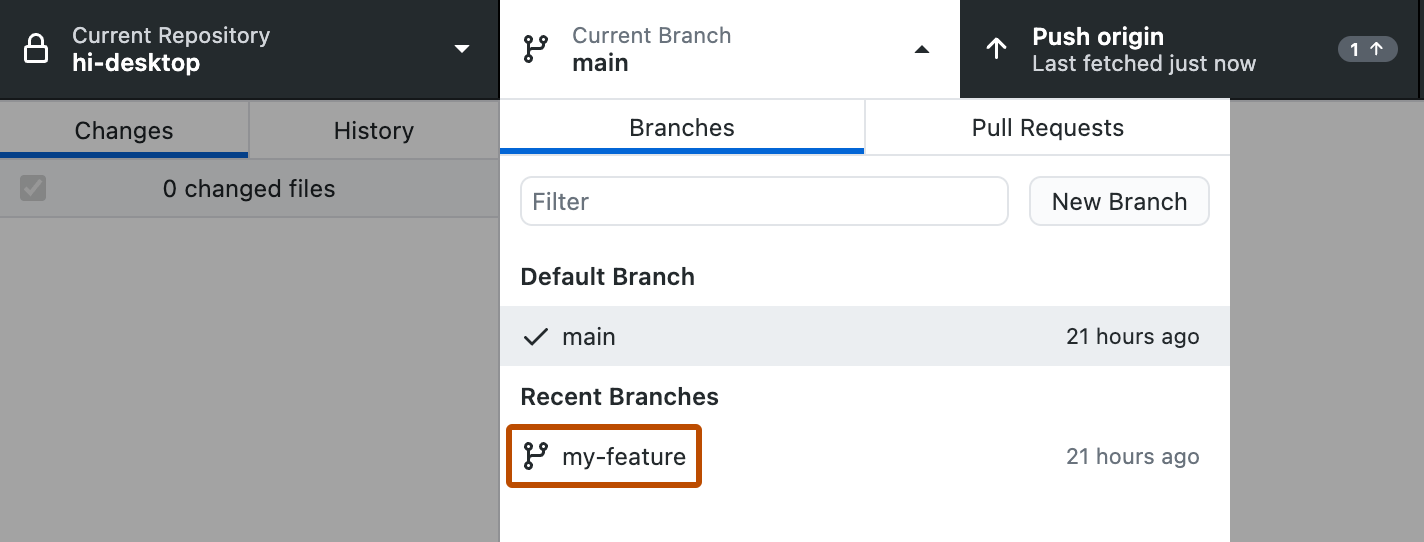
- Click Publish branch.

Switching between branches
You can view and make commits to any of your repository's branches. If you have uncommitted, saved changes, you'll need to decide what to do with your changes before you can switch branches. You can commit your changes on the current branch, stash your changes to temporarily save them on the current branch, or bring the changes to your new branch. If you want to commit your changes before switching branches, see "Committing and reviewing changes to your project."
Tip: You can set a default behavior for switching branches in the Advanced settings. For more information, see "Configuring basic settings."
- In GitHub Desktop, click Current Branch.

- In the list of branches, click the branch you want to switch to.
- If you have saved, uncommitted changes, choose Leave my changes or Bring my changes, then click Switch Branch.

Deleting a branch
You can't delete a branch if it's currently associated with an open pull request. You cannot undo deleting a branch.
Further reading
- "Cloning a repository from GitHub Desktop"
- "Branch" in the GitHub glossary
- "About branches"
- "Branches in a Nutshell" in the Git documentation
- "Stashing changes"
Github How To Create A New Branch
Source: https://docs.github.com/en/desktop/contributing-and-collaborating-using-github-desktop/making-changes-in-a-branch/managing-branches
Posted by: hoffmanvalinarts.blogspot.com
0 Response to "Github How To Create A New Branch"
Post a Comment